
How to Use Pages
April 17, 2026
Formpify Academy
Multi-Page Forms
Build complex forms by splitting them into effortless, high-converting steps.
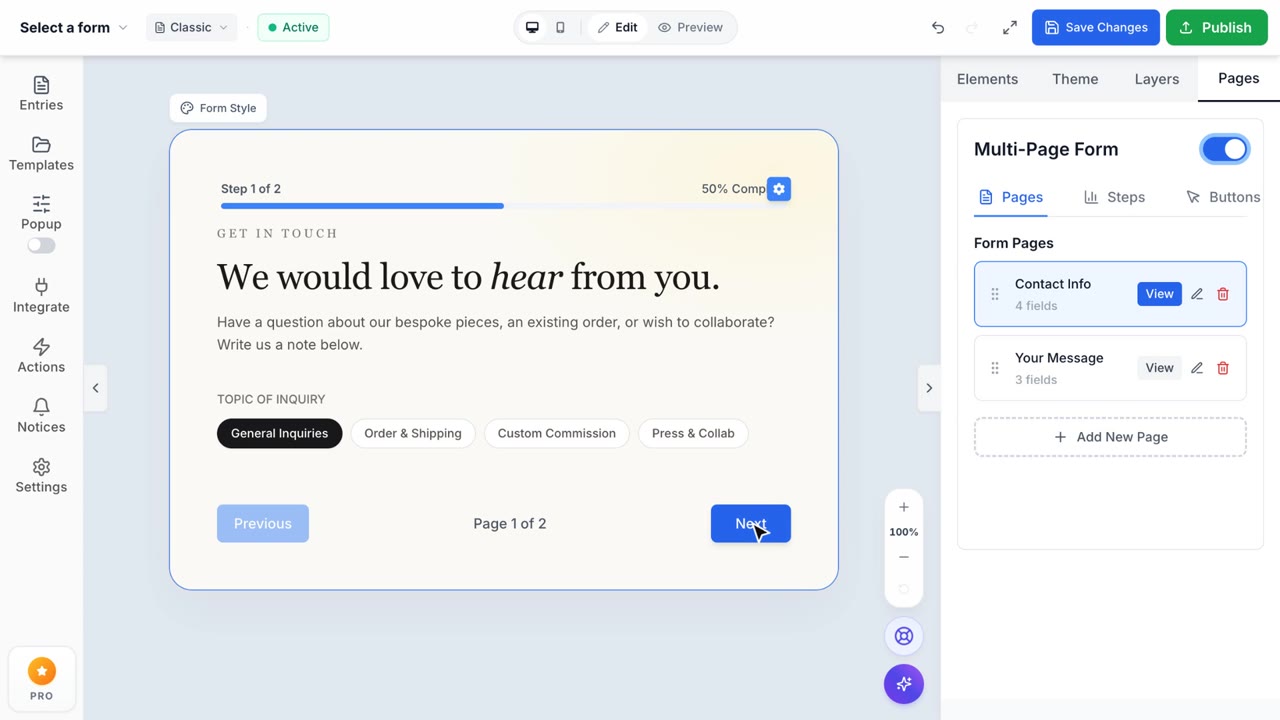
Step 1: Enable Multi-Page Mode
In your form builder, open the right-side configuration panel and select the Pages tab. Toggle the Multi-Page Form option ON to begin splitting your form into sequential steps.
Step 2: Add and Manage Pages
Under the "Pages" tab, you can take full control of your form's sequence:
- Add New Page: Click the "+ Add New Page" button. The builder smartly inherits field configurations from your primary page to maintain a consistent layout. (Note: Free accounts can create up to 3 pages; Pro accounts have unlimited pages).
- Edit Title & Description: Provide custom page titles and helpful sub-descriptions (e.g., "Enter your contact information") to guide users on each step.
- Reorder Pages: Click and drag the six-dot grab icon next to any page to instantly change your workflow's order.
To move input fields between pages, simply utilize the View button to jump to a specific page canvas, then drag and drop fields into it normally.
Step 3: Configure Progress Indicators
Switch over to the Steps tab to customize how users track their completion progress:
- Progress Type: Choose between a classic Progress Bar (Free), or upgrade to Pro to unlock premium indicators like Numbered Steps, Dots Navigation, Tabs Style, and Percentage Text.
- Visual Styling: Tailor the bar's aesthetics. Customize the track background color, active progress color, absolute height (px), border radius, and conditionally show numerical percentage/step counters.
Step 4: Customize Navigation Buttons
Finally, open the Buttons tab to adjust how users navigate between your pages:
- Button Styling: Modify the navigation buttons background and text colors to perfectly match your brand's theme. Check "Show Page Counter" to display a dynamic "1 of X" indicator.
- Advanced Layout (Pro): Take precise control over the button container width (e.g., Full Width 100%, Auto, or fixed pixels), font size, and border rounding.
- Custom Copy (Pro): Override the default navigation labels with your own custom "Previous", "Next", and "Submit" text configurations.